March 19, 2017
|
March 19, 2017 |
||
|
|
|
|
I spoke to Morris
and found him to be very customer focused and more concerned that I
would get what I wanted done, than It would be best to
specify to Morris what you are currently using for your ignition system
and what you MAY plan to Morris talked to me
about the way that he performs the work and exactly what I would be
getting for each price that he quoted. Now he I have no financial interest and received no
discount for any work done in lieu of posting favorable comments. Morris Mintz For those so inclined to want to do their own, this is a link to Anthony Rhodes great 2002 article on Speedometer Repairs & Rebuilding in pdf form.
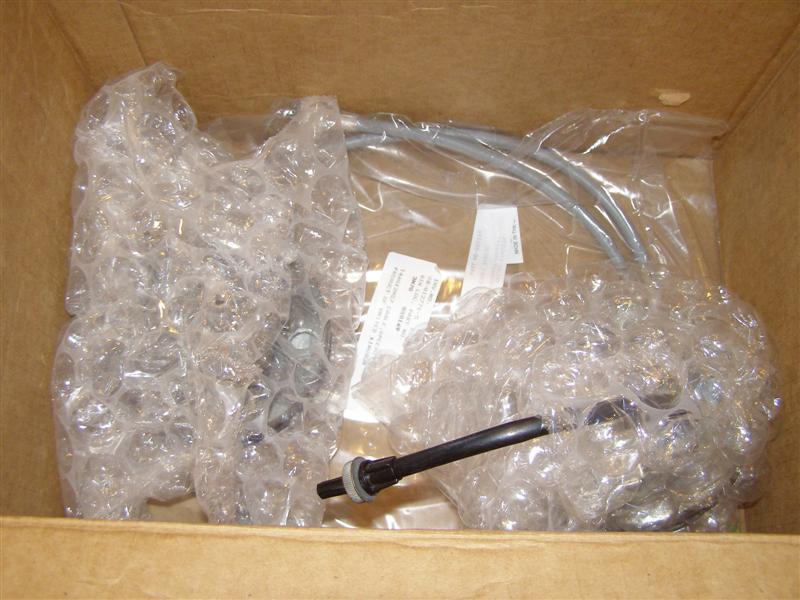
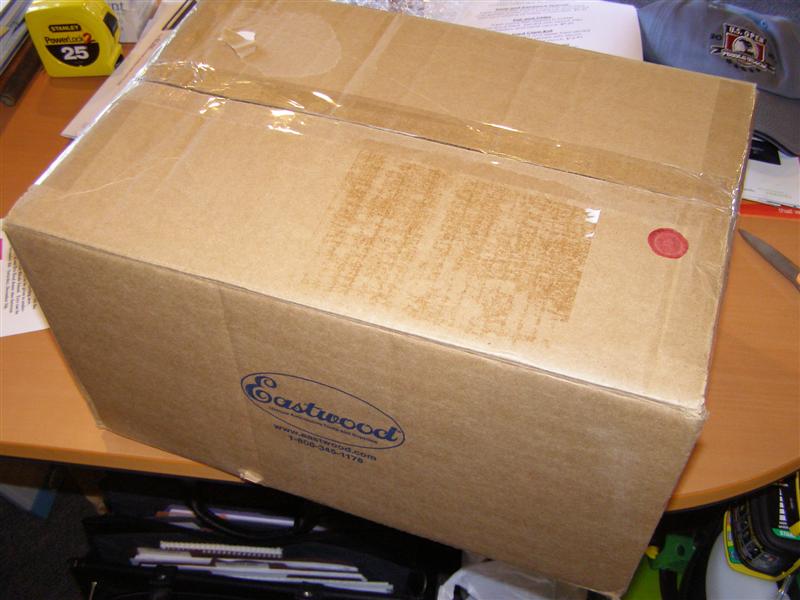
Please note the
speedometer cable in the bottom of the box. If you have your
speedometer overhauled (more on that later) you must send the ****
Viewers are warned that if they attempt any mechanical repairs or
modifications,
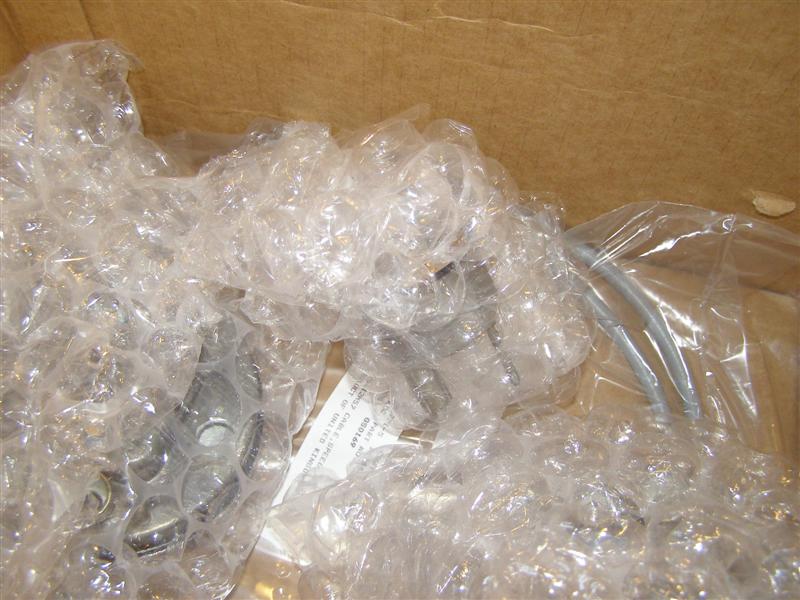
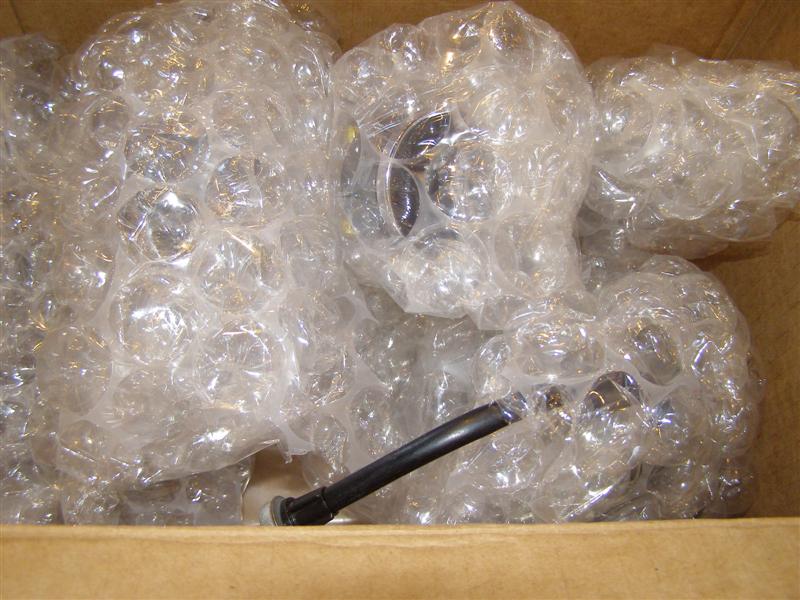
Wrap each gauge with several layers of bubble pack.
It's a pain, but necessary, unless you have ready made containers that will cushion the ride to California.
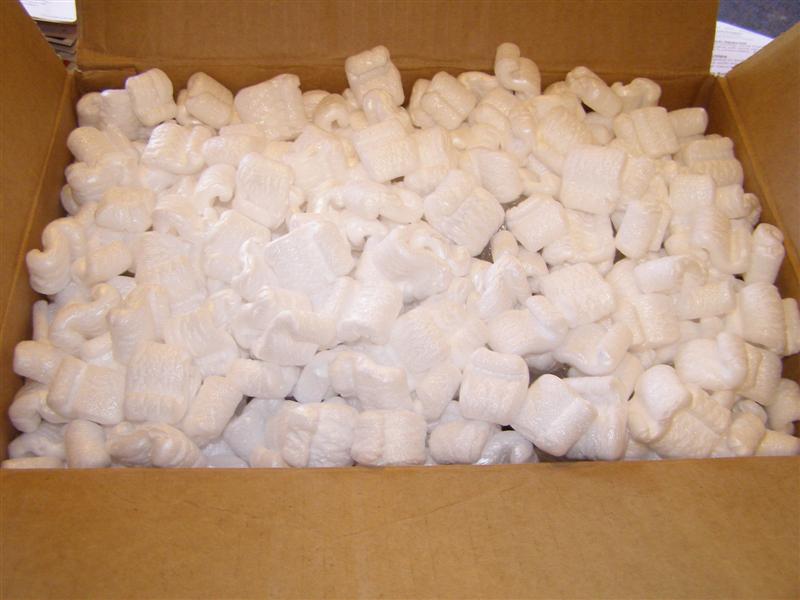
Finally, fill the box with shipping popcorn and seal it up securely.
Now this box is
ready to go inside another box and will be surrounded with popcorn as a
double cushion.
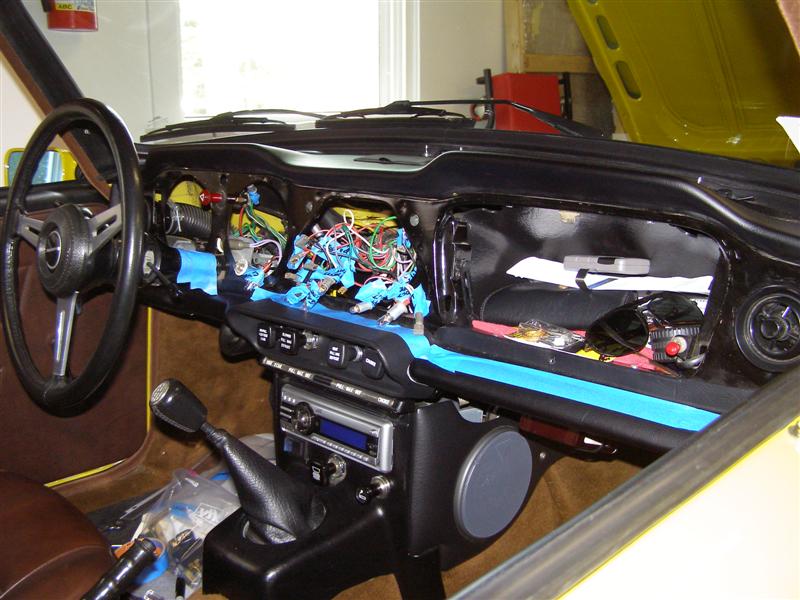
And just to remind
you before starting, clearly tag every wire and light. Your memory
will not be that good And the painters
tape does protect the vinyl, column and the wood on the dash during the
time you will be
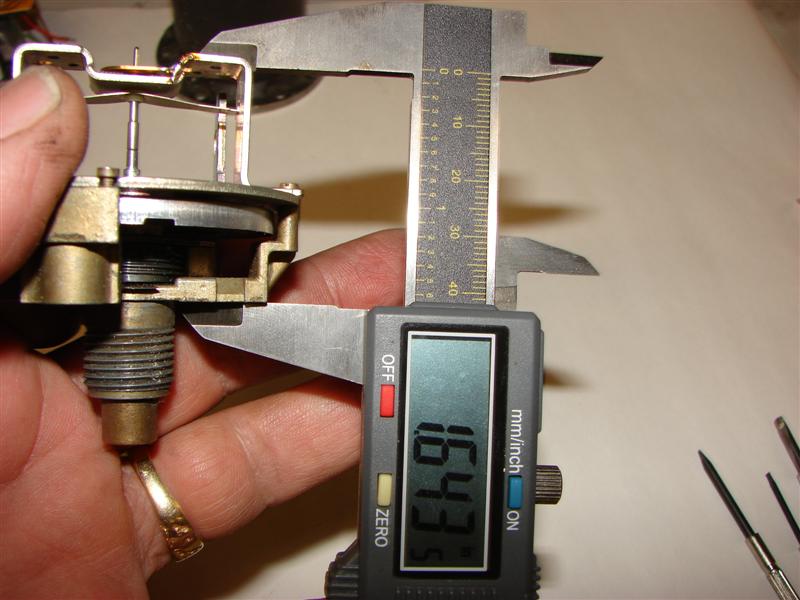
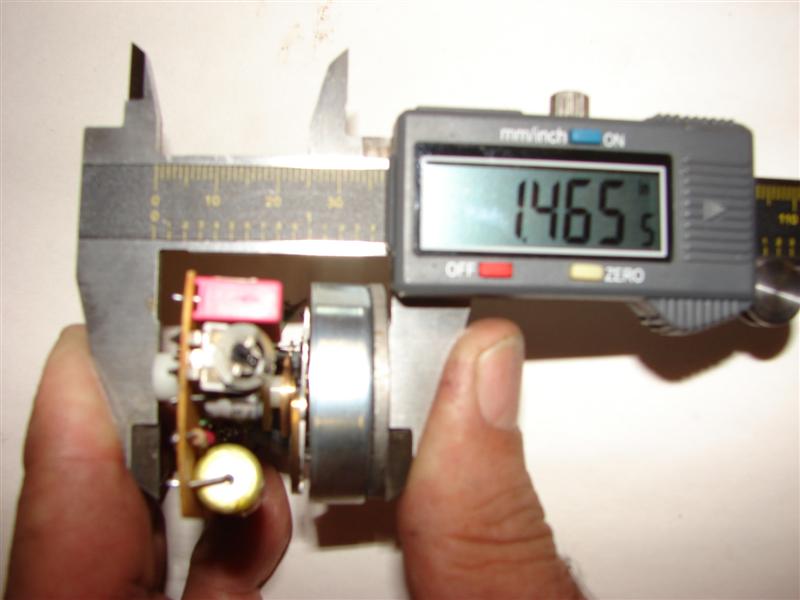
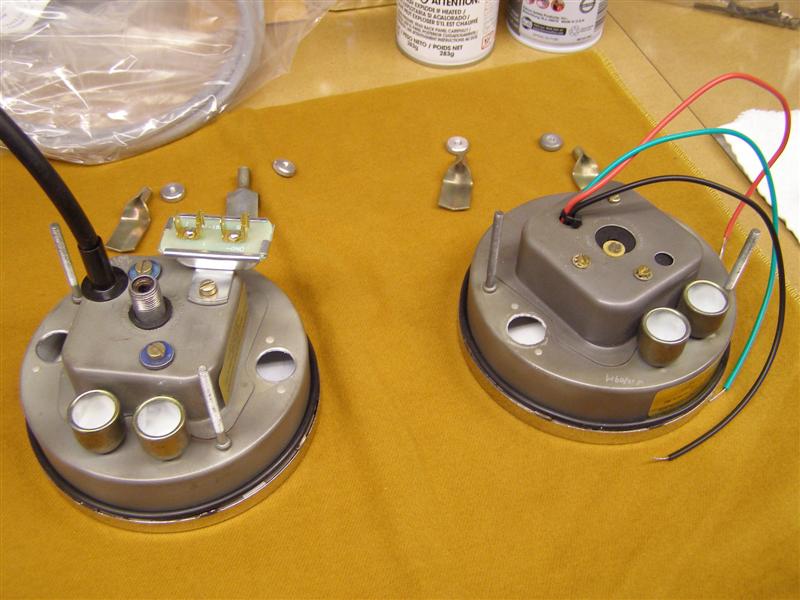
The depth of this is important in the final construction of the tachometer conversion.
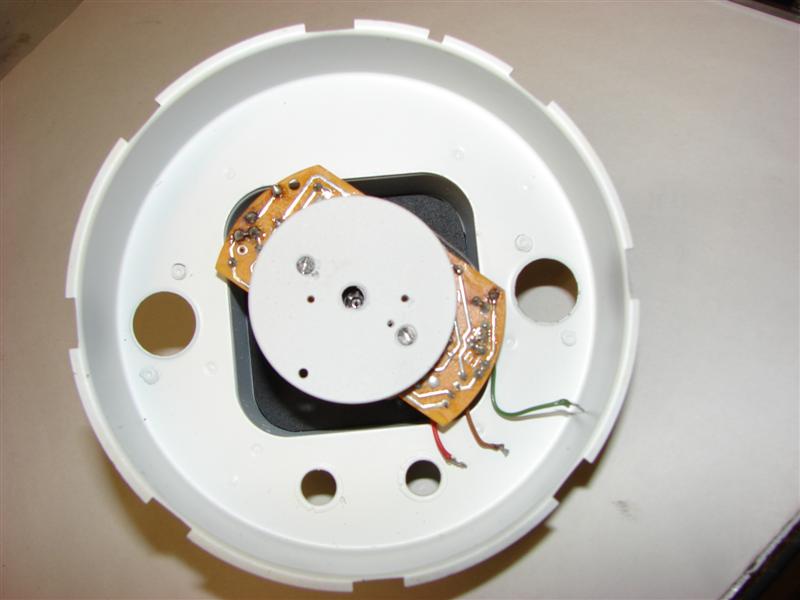
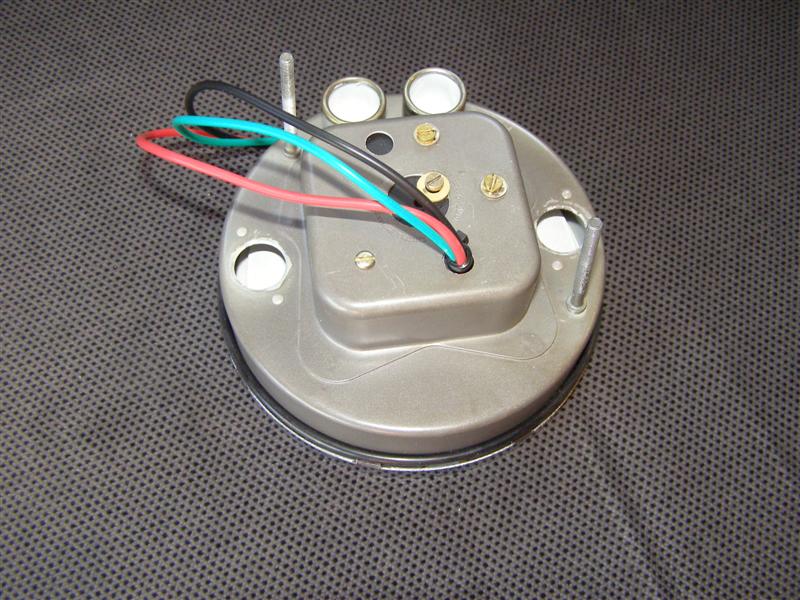
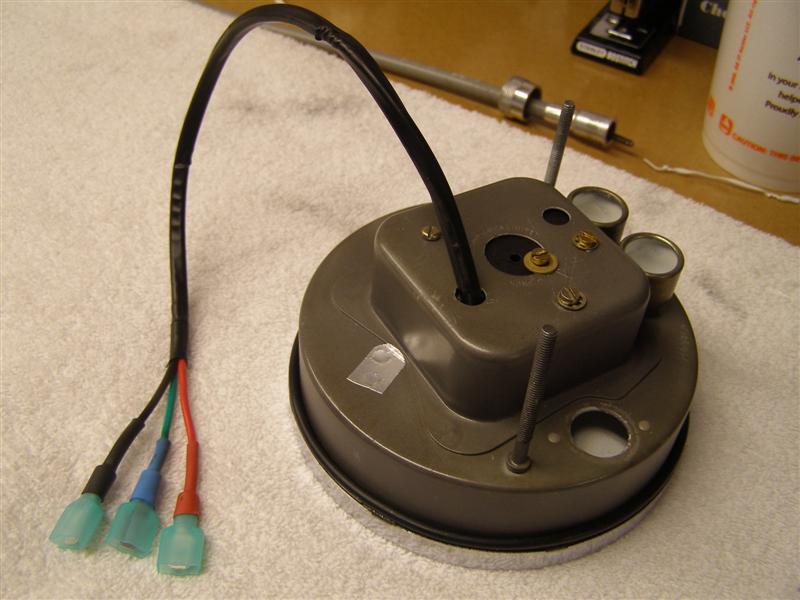
This will be the new electronic tachometer drive unit, replacing the old cable driven mechanical unit.
Again, Morris takes more measurements.
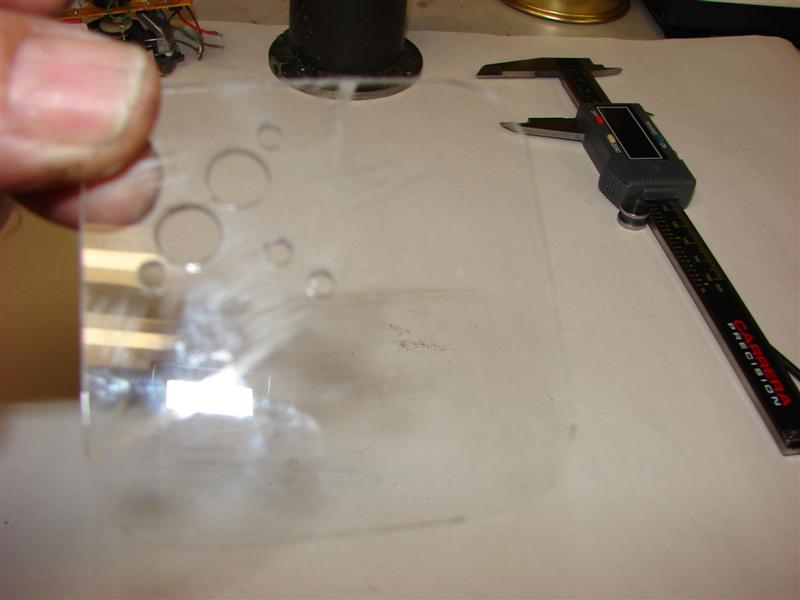
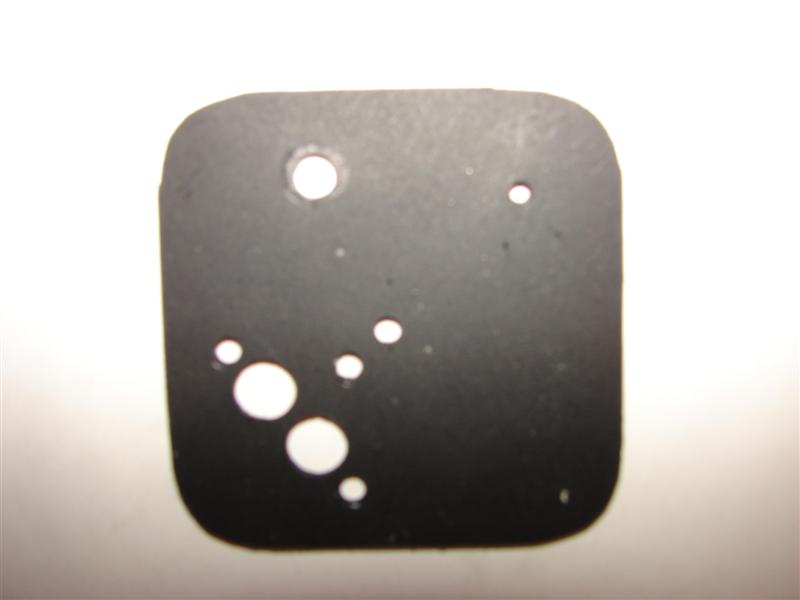
Spacer plates are made to match the needed holes.
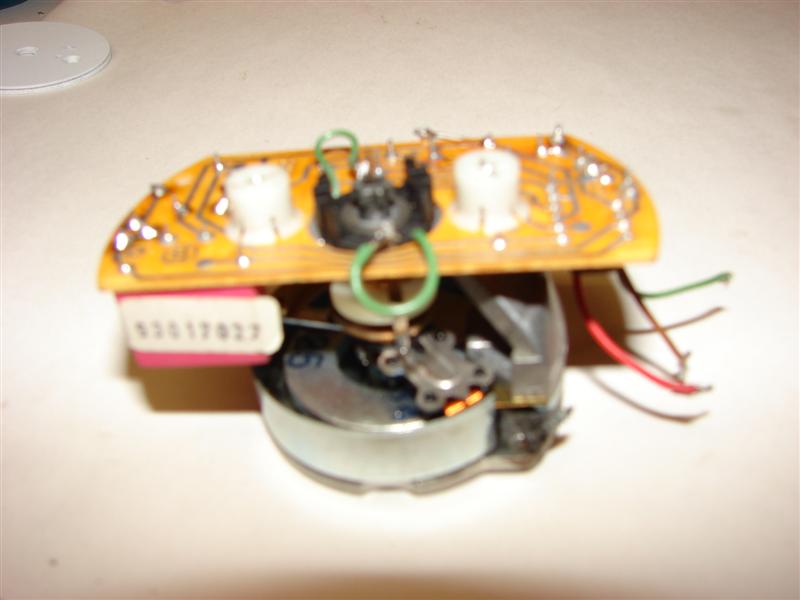
Clear plastic that will be painted as shown below.
This is now ready to be assembled.
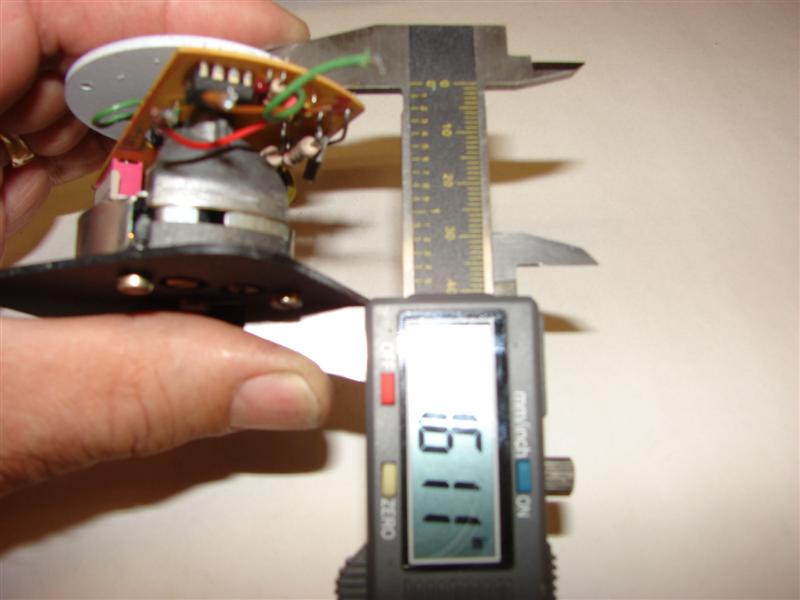
A little more tolerance stacking, so to speak.
Now it fits at the
exact same depth as the previous mechanical unit and will not make the
tachometer
Notice that there are no holes drilled in the front of this or any overlays applied to the original face?
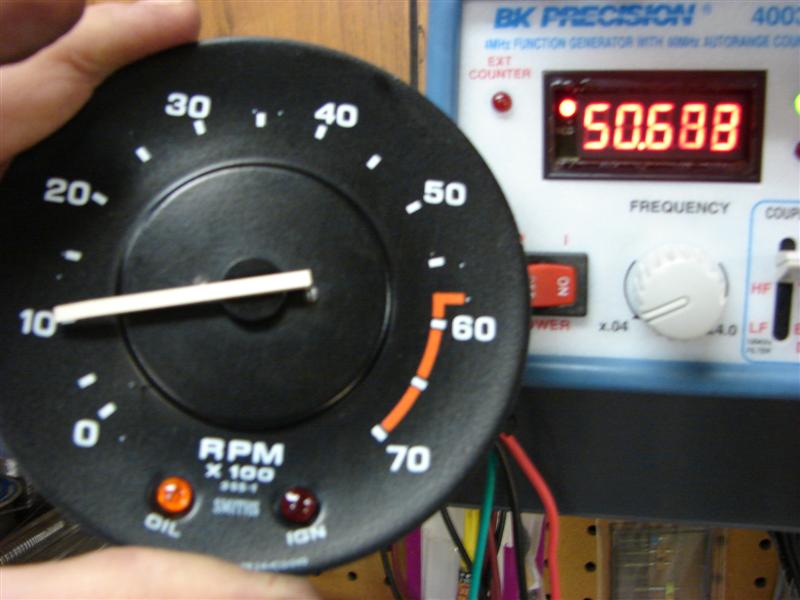
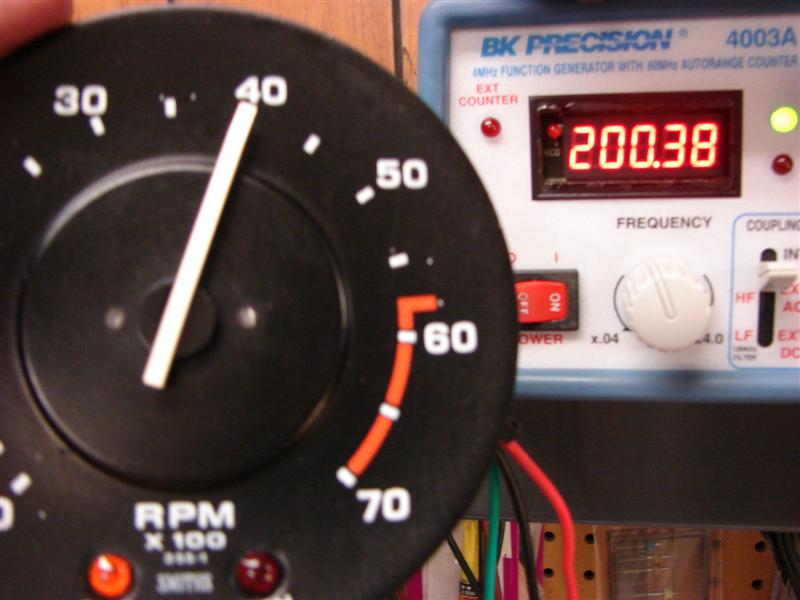
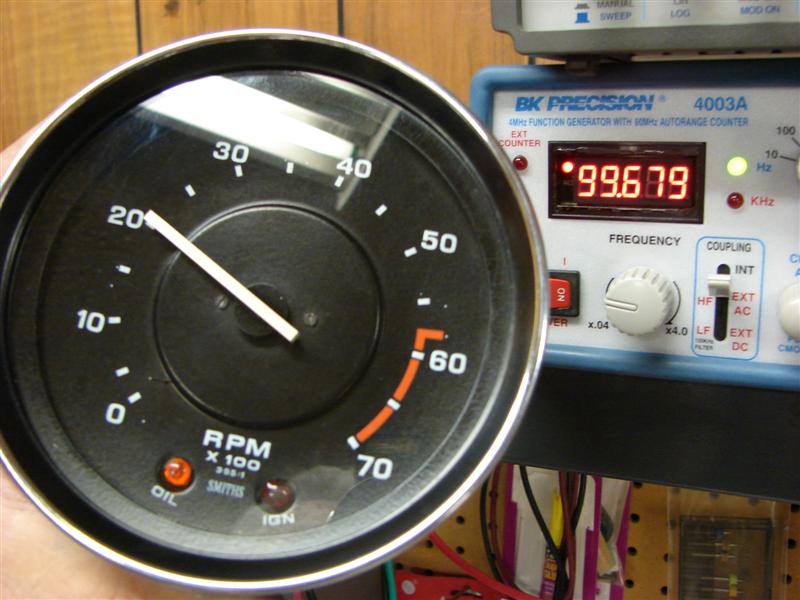
Dead on the money when factored up the required 2X.
No way to tell that from a factory TR6 tach unless you look at the back and don't see the needle bounce when it's cold.
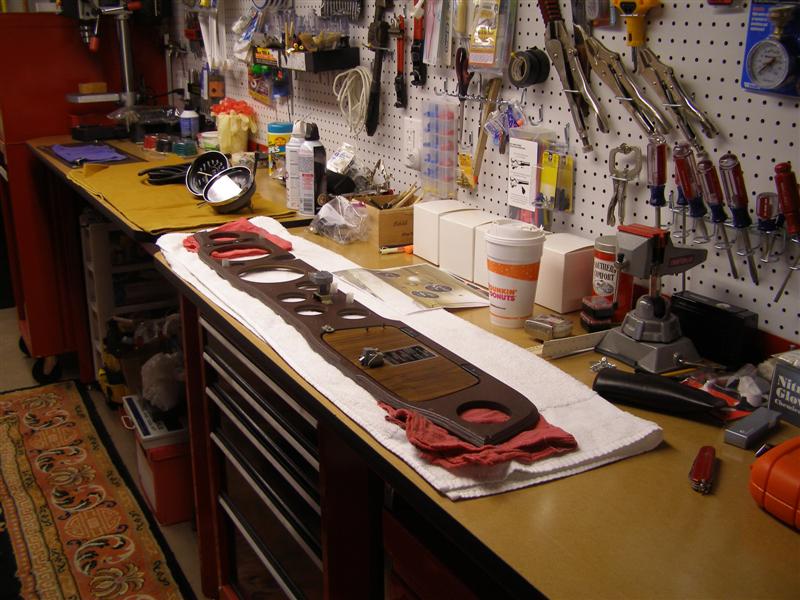
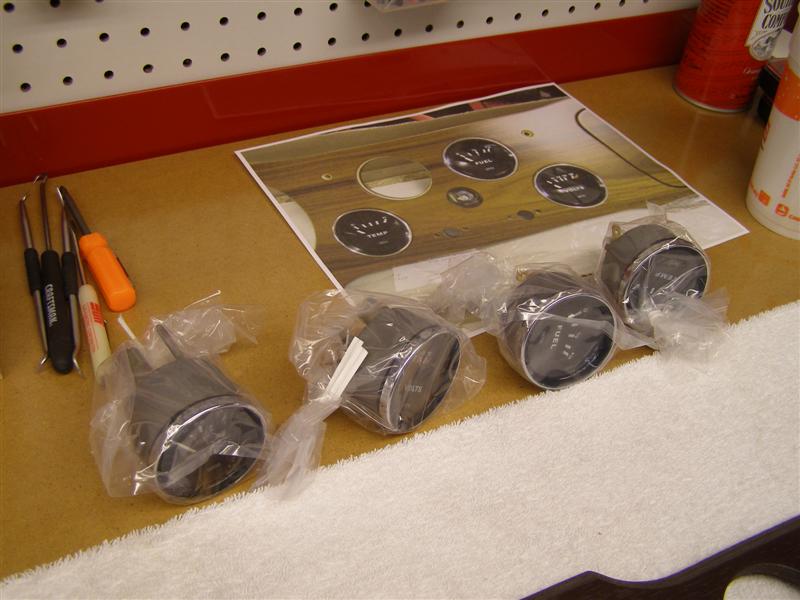
Now for the little guys. These boxes are getting very scarce these days
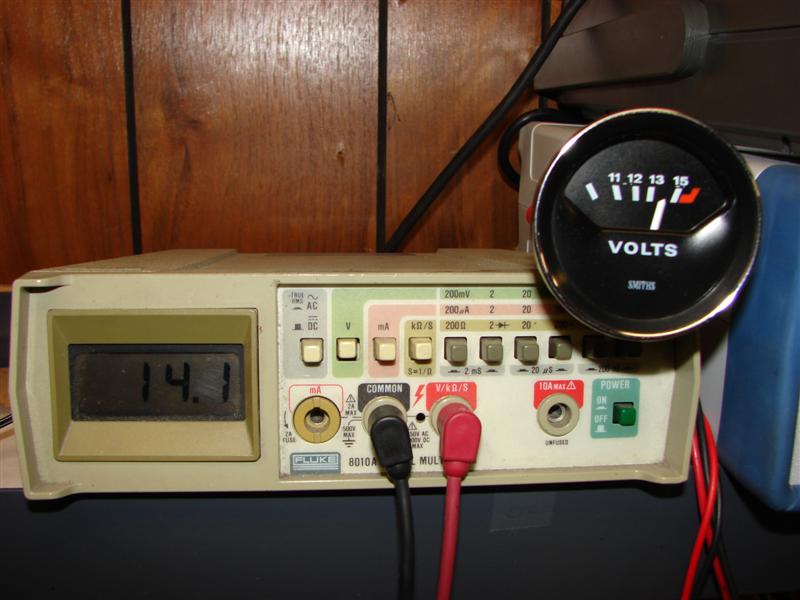
That looks good. I don't want to overheat.
Another important gauge. Can't drive far without gasoline.
Moving right along.
I guess that Morris wanted to go digital for some reason on this one.
Works the same when all buttoned up. That's a good thing.
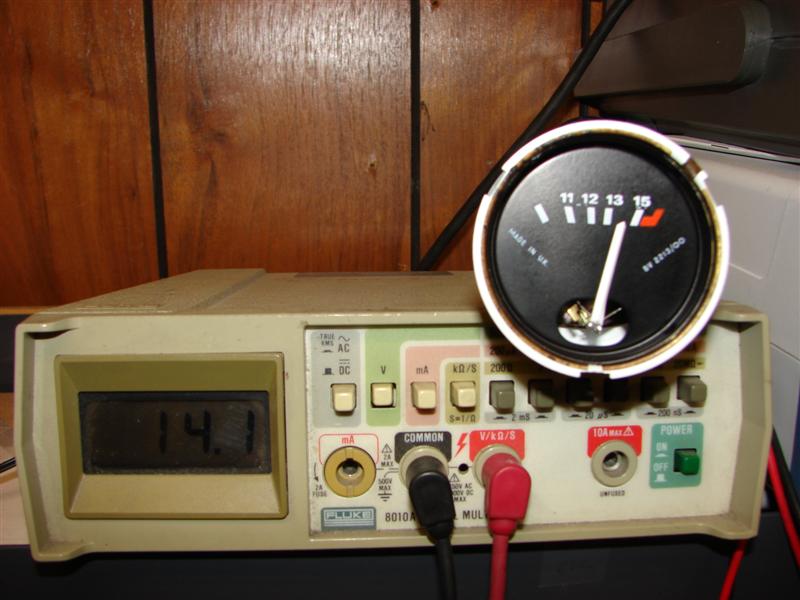
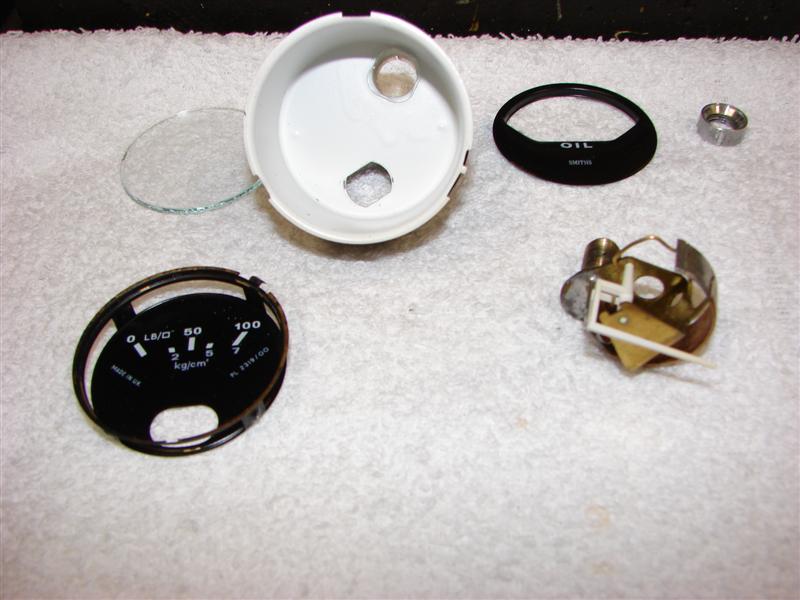
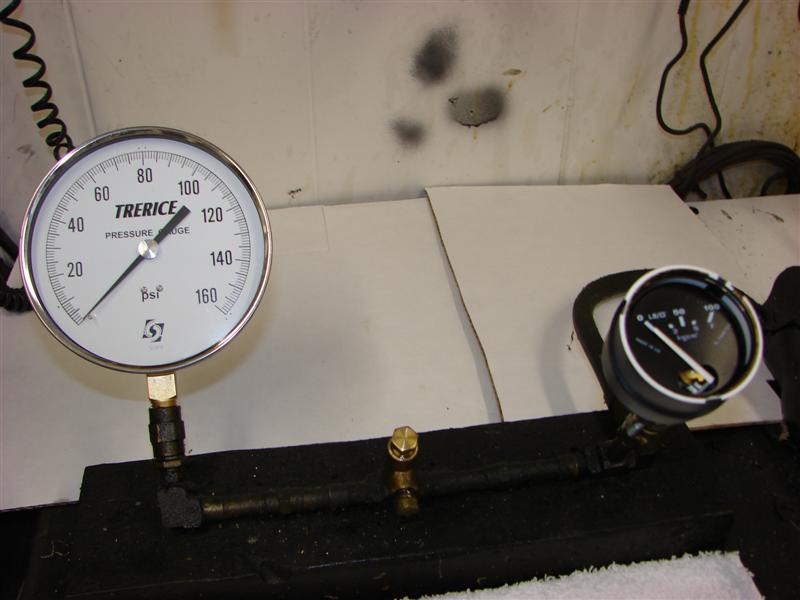
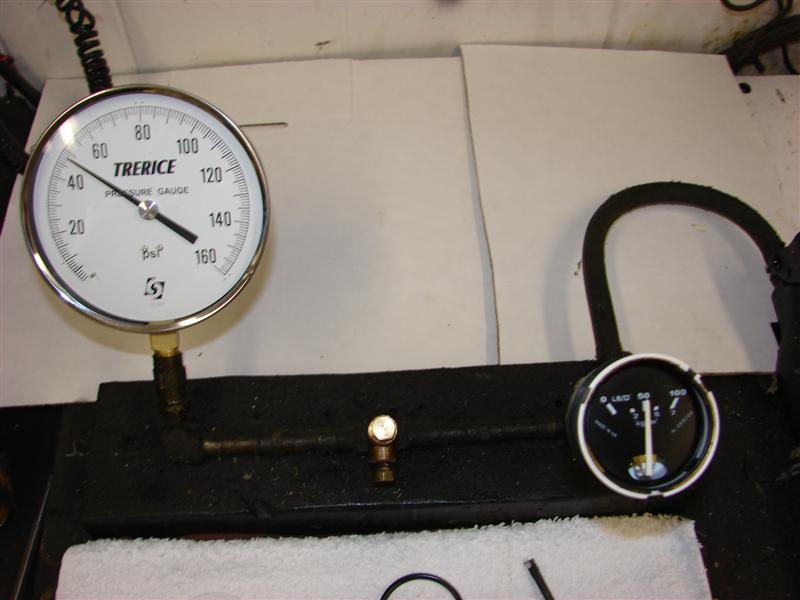
Now for Mr. Oil Pressure. As it turned out, the bourdon tube in mine was getting shakey.
Now was the time for a new unit. Too much invested in the engine to take a chance on inaccurate readings. . Of course, this is purely mechanical.
That's a nice number to see, but it only lasts until the oil gets warm.
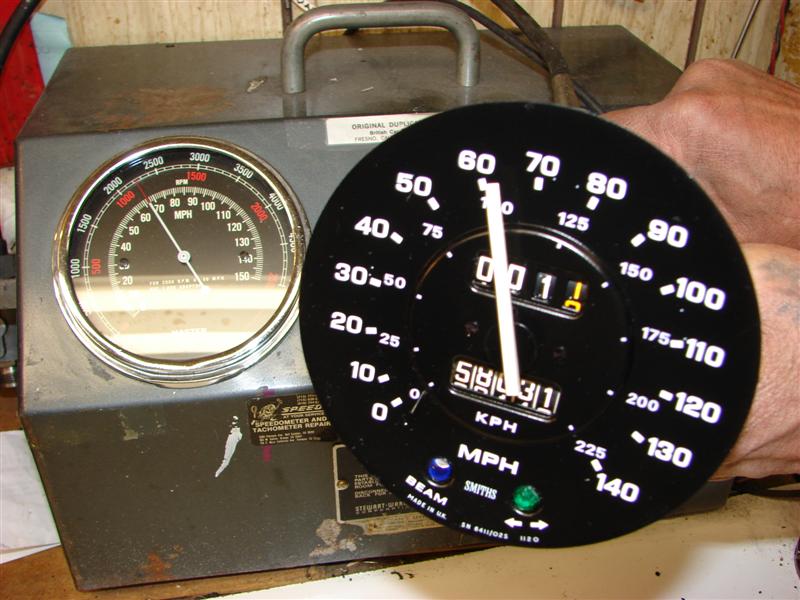
And again, pretested after assembly and prior to shipping.
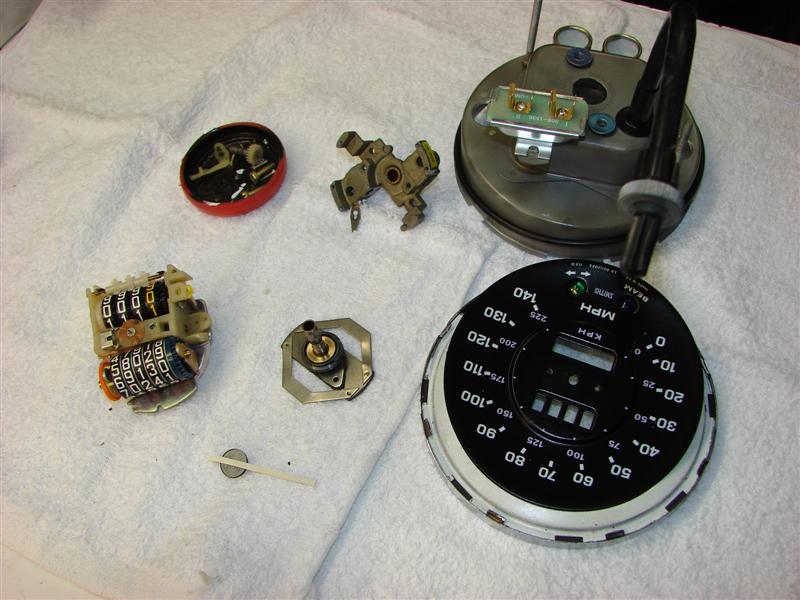
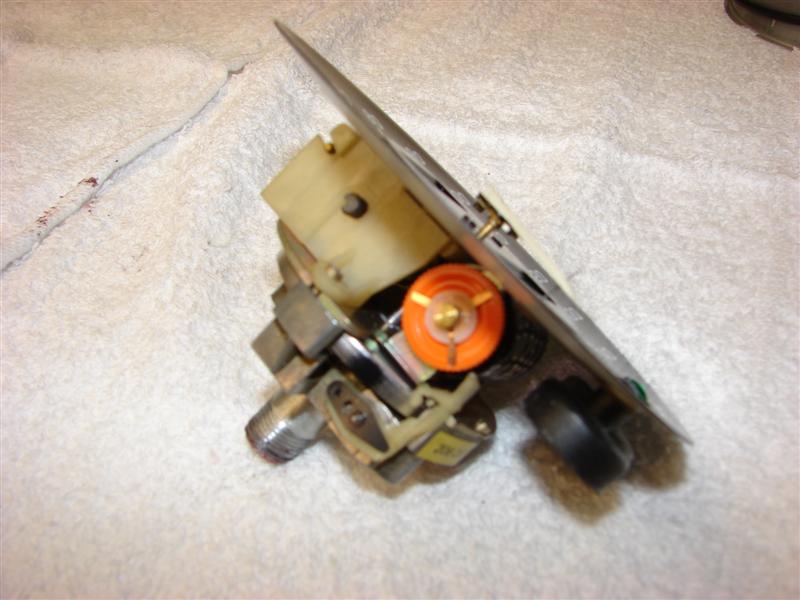
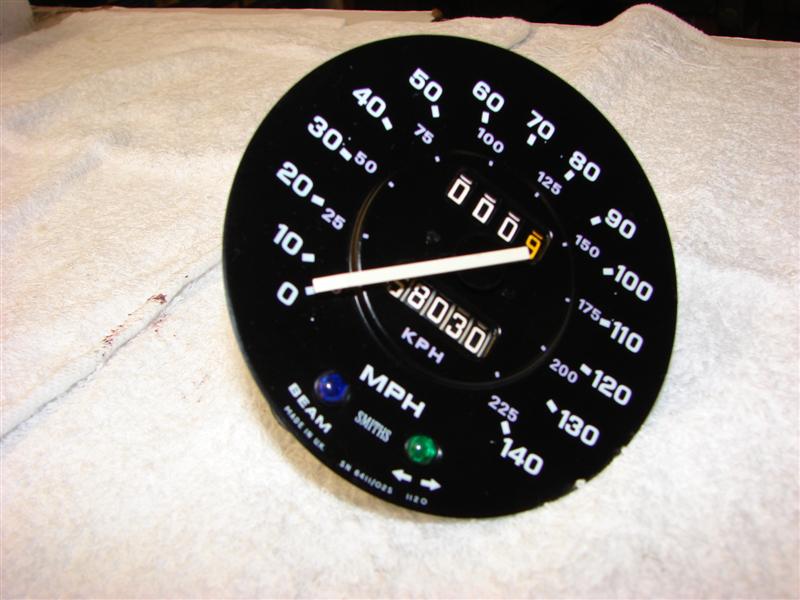
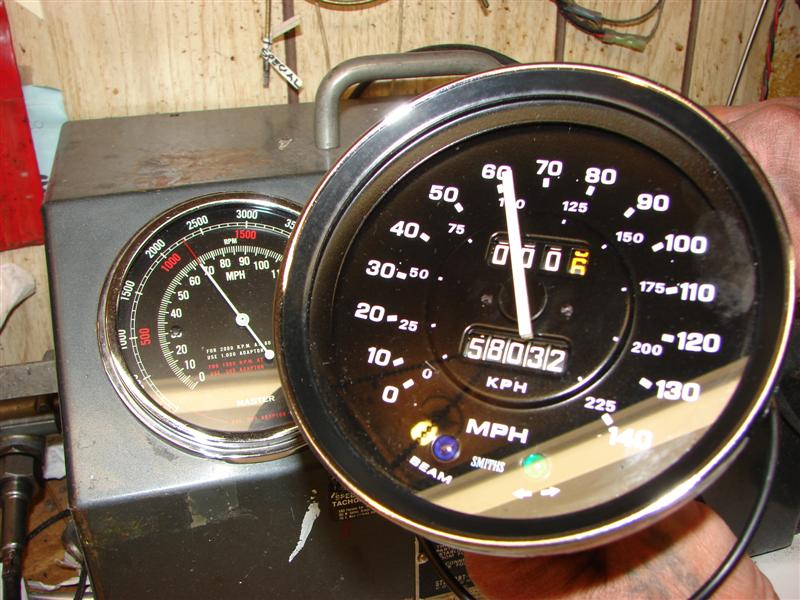
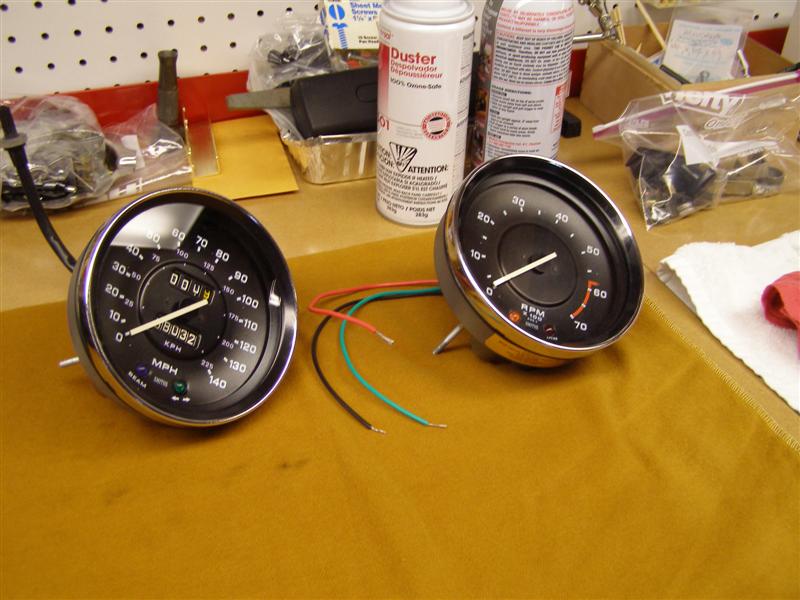
The speedometer was quivering around the 30-32 and 55-56 MPH ranges, so it was time for a cleanup.
When I stated that
the speedometer would get an overhaul earlier, it was because this unit
has to
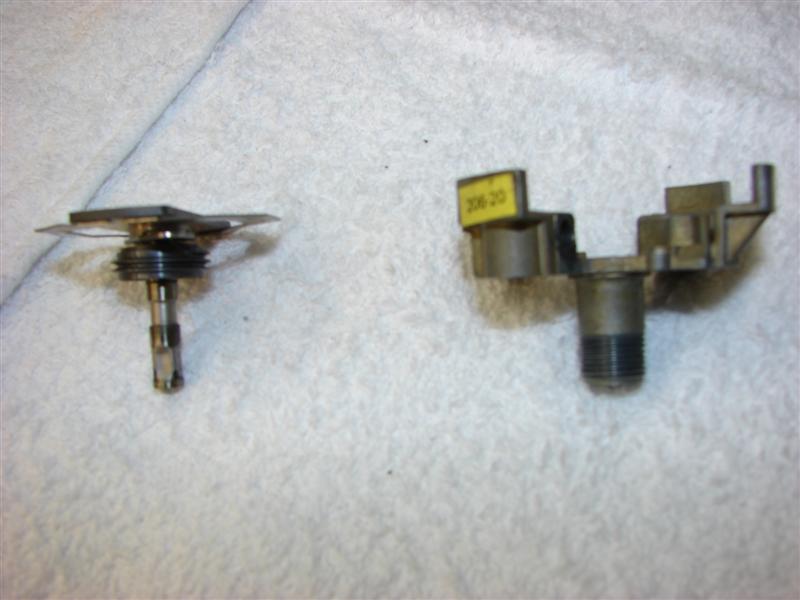
As it turned out, I needed a few minor parts, but it's better than new now.
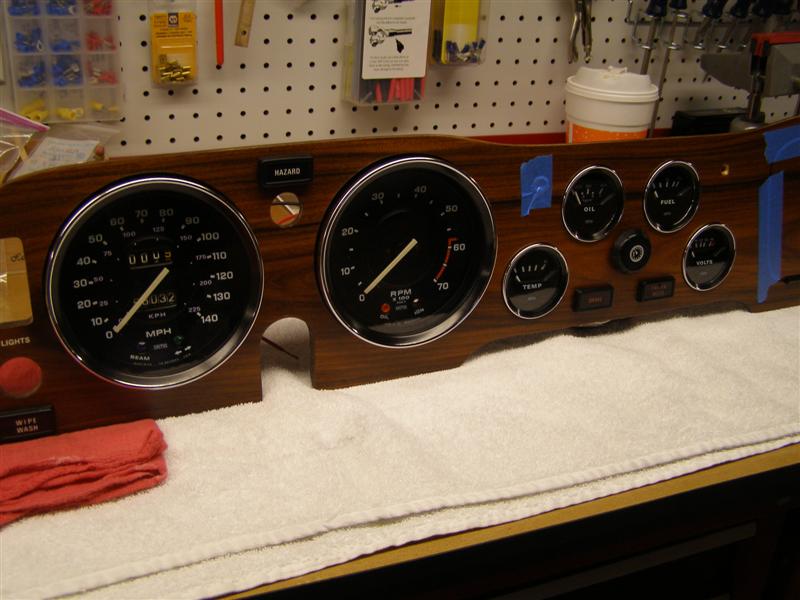
I had cleaned all of the gauge faces when I painted the cases last year.
That looks good. No more shaky needle at any speed.
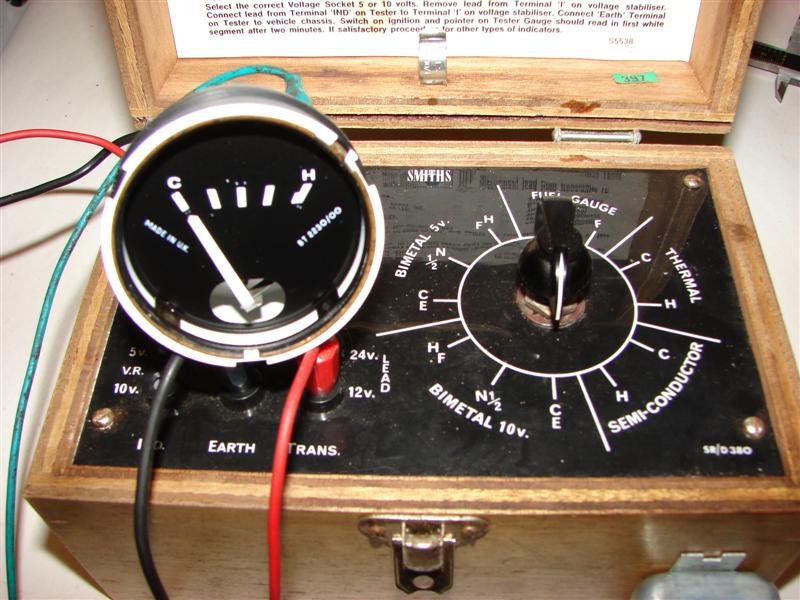
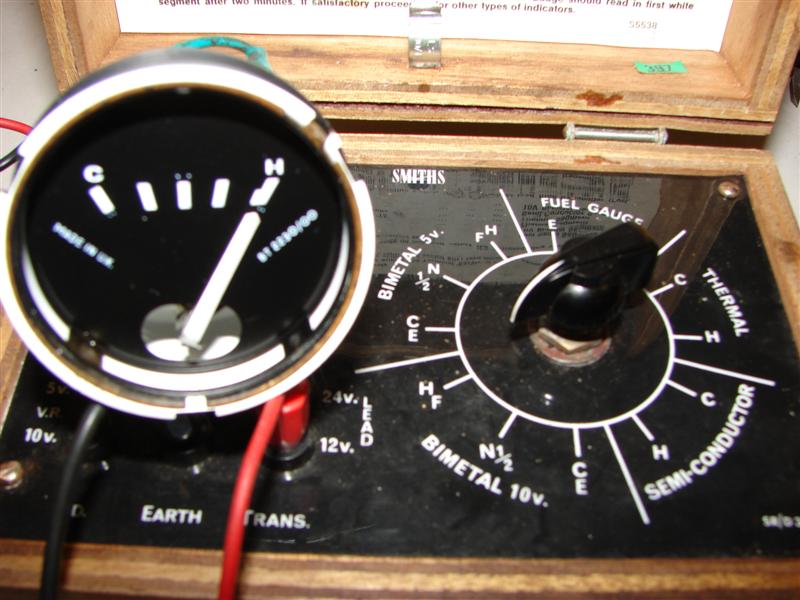
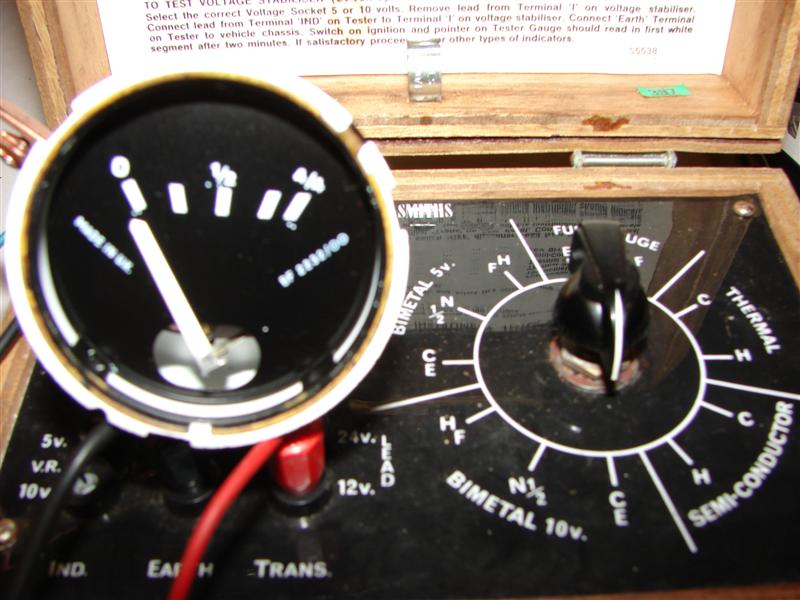
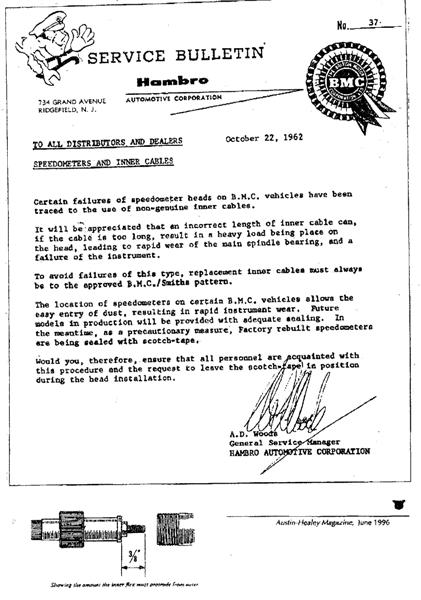
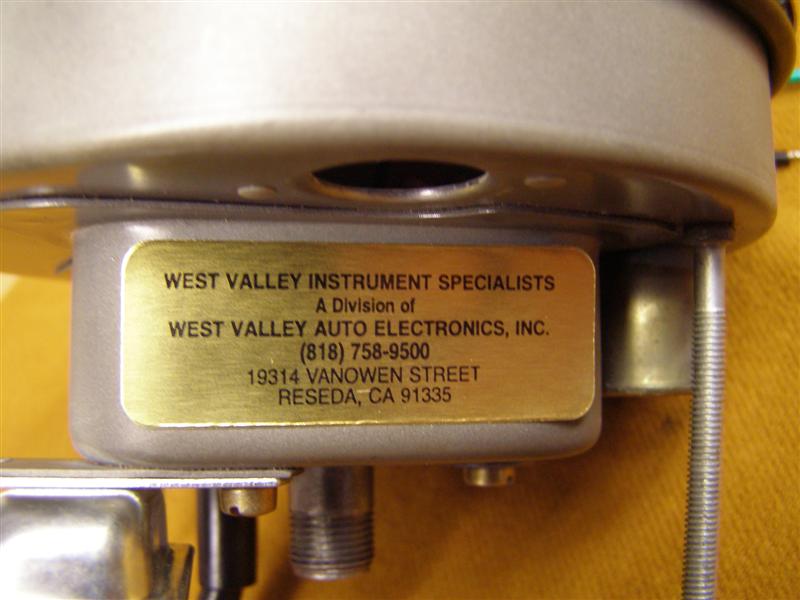
Morris is supplying
this to all of us. This is the tech bulletin that went to all
Smith gauge BMC dealers
You can download the pdf file by clicking here: Tech Bulletin for Correct Speedometer Cable Length All ready to come back to me.
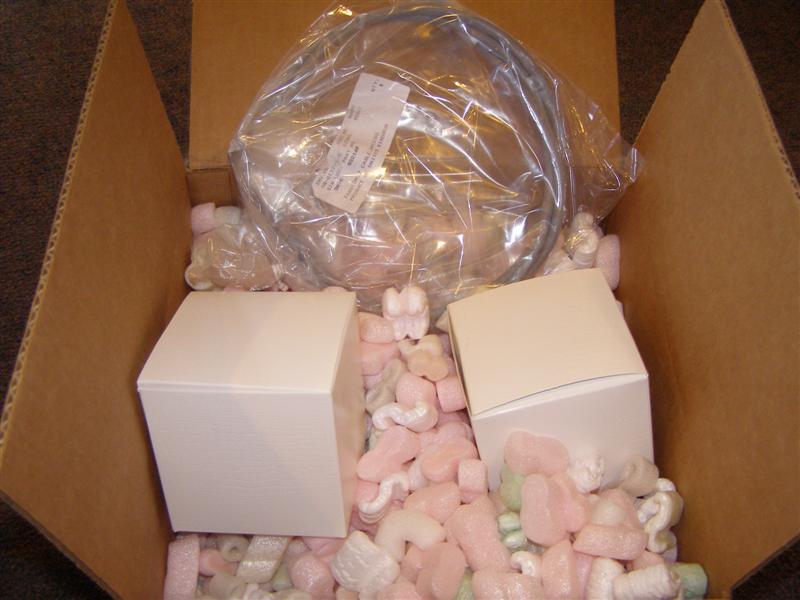
Fifteen days after sending my gauges to Morris, they are back home, safe and sound.
I sent along a brand new cable to be checked and Morris did have to trim it a bit to match the 3/8" spec above. Very professionally packaged to prevent damage and each gauge was sealed in a plastic bag inside the boxes.
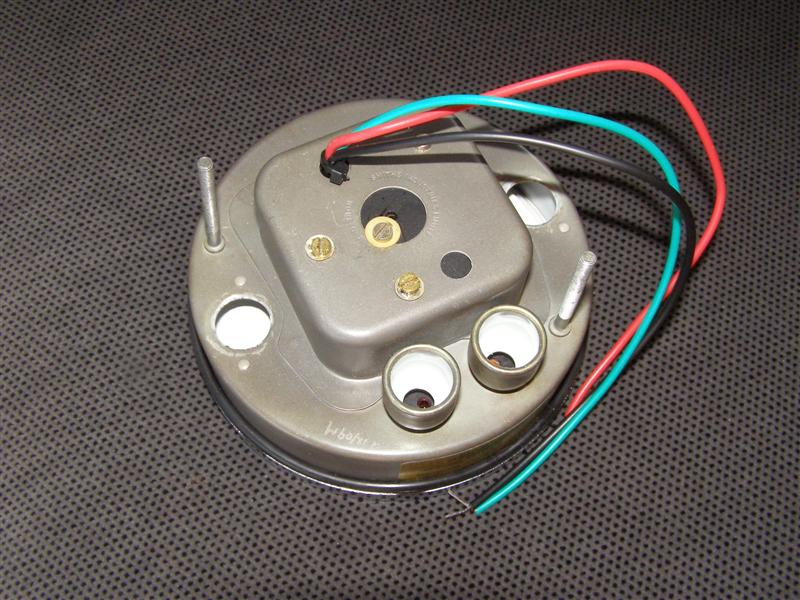
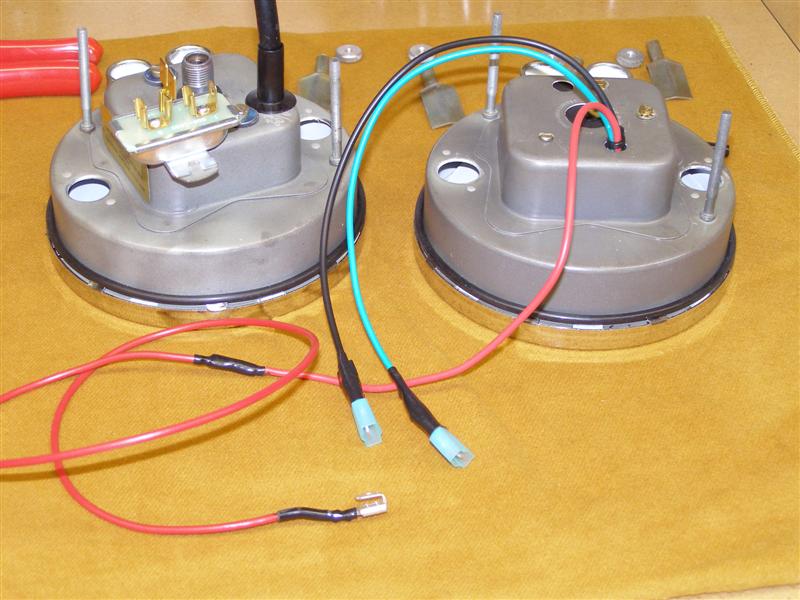
This is the back of the newly converted tachometer.
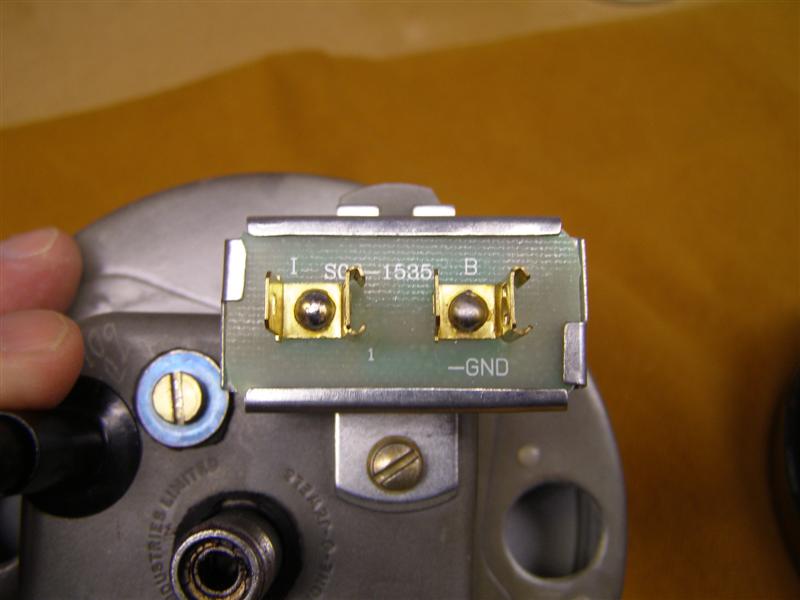
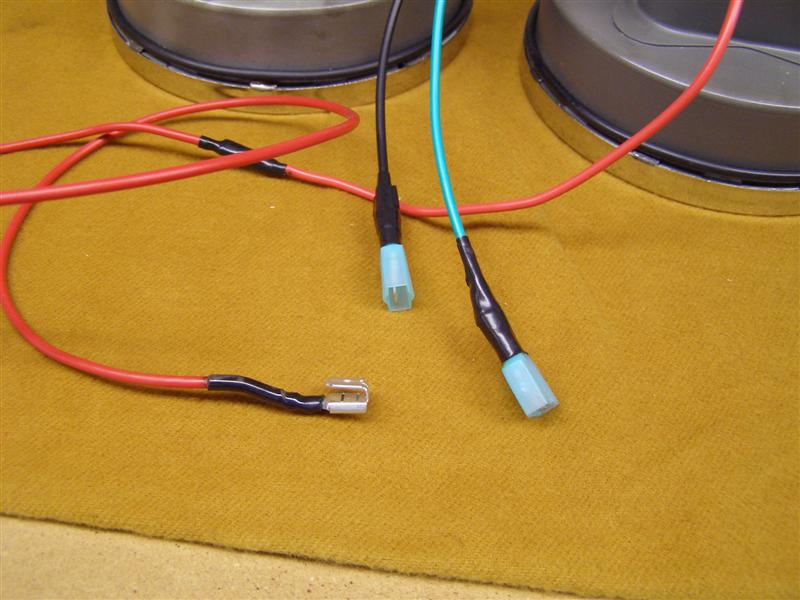
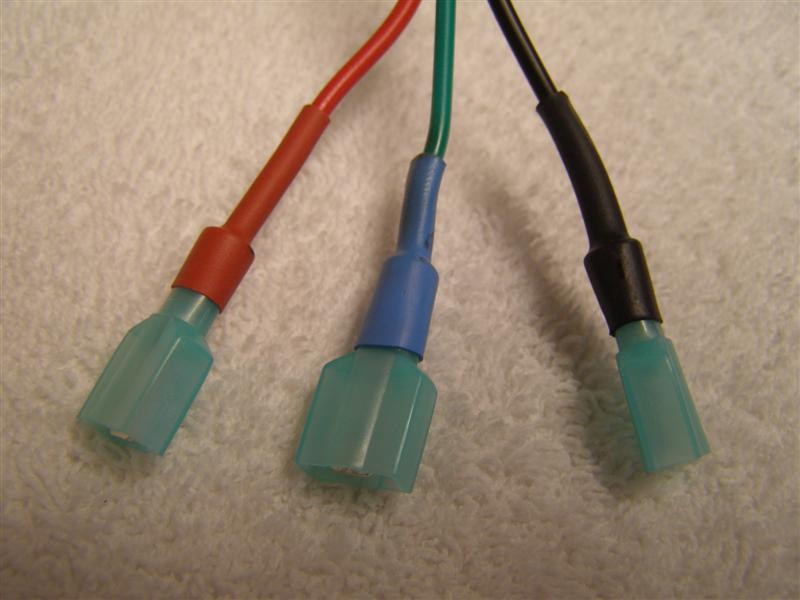
Red goes to the "B"
terminal on the voltage stabilizer on the speedometer. Green goes
to the (-) negative
Time to start putting things back together again.
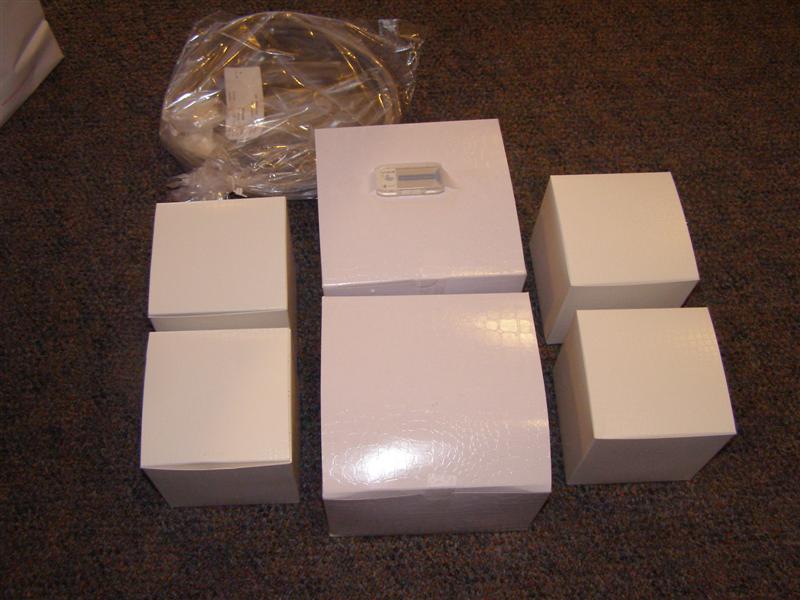
These look better than when I sent them and they looked great then.
A little promotion spot for Morris.
This is where the Red wire from the tachometer will be attached at "B".
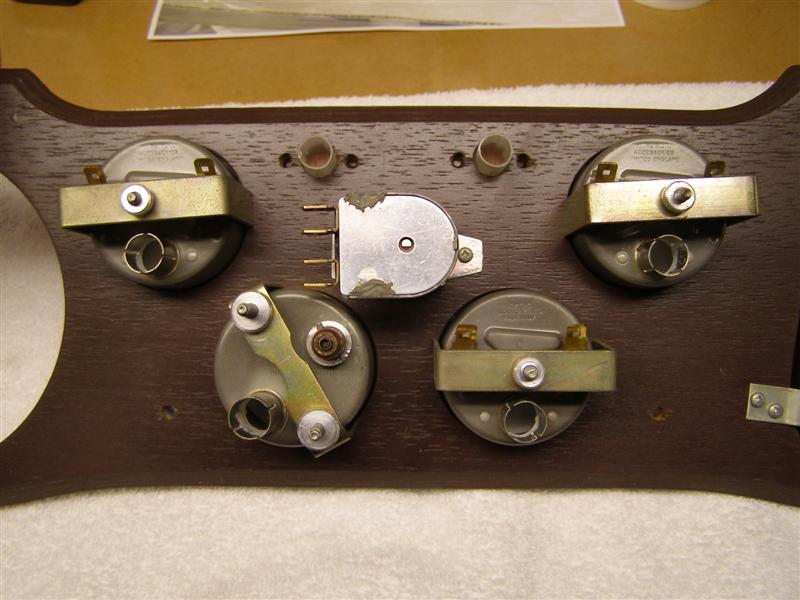
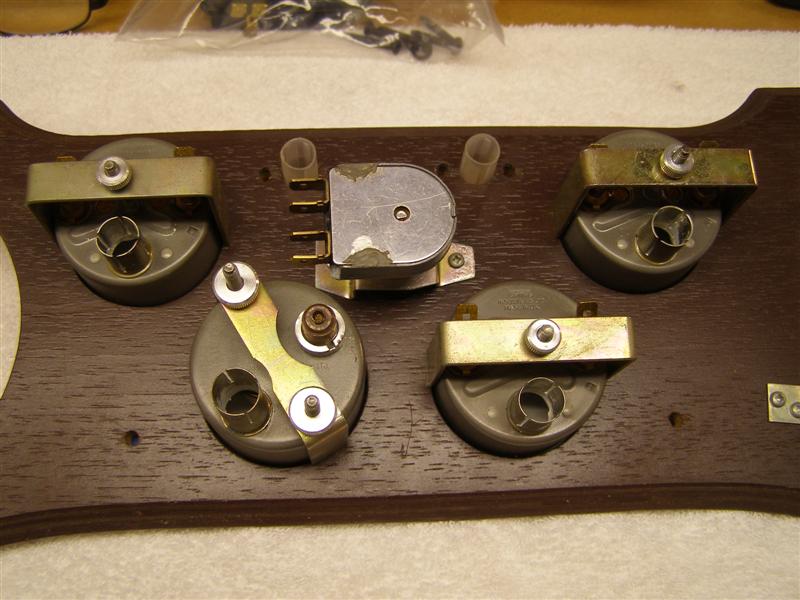
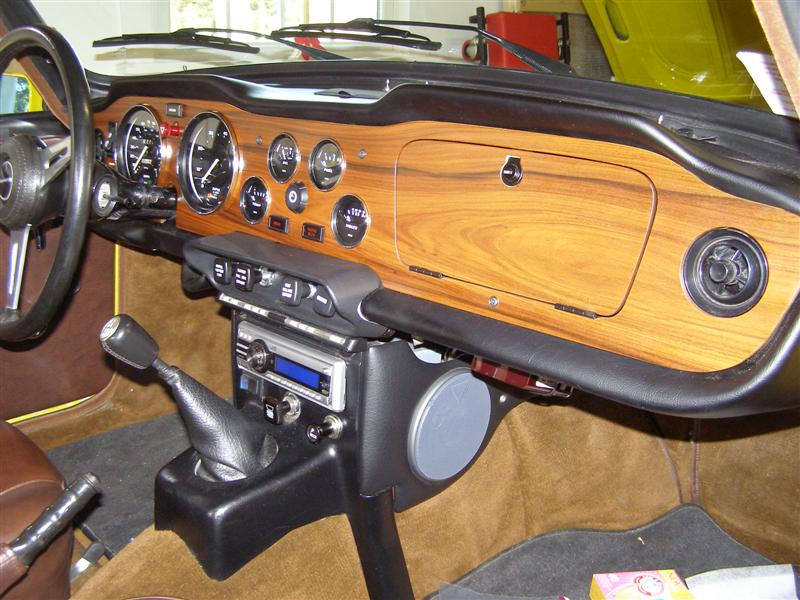
The picture is so that I don't have to rearrange the gauges after I install them.
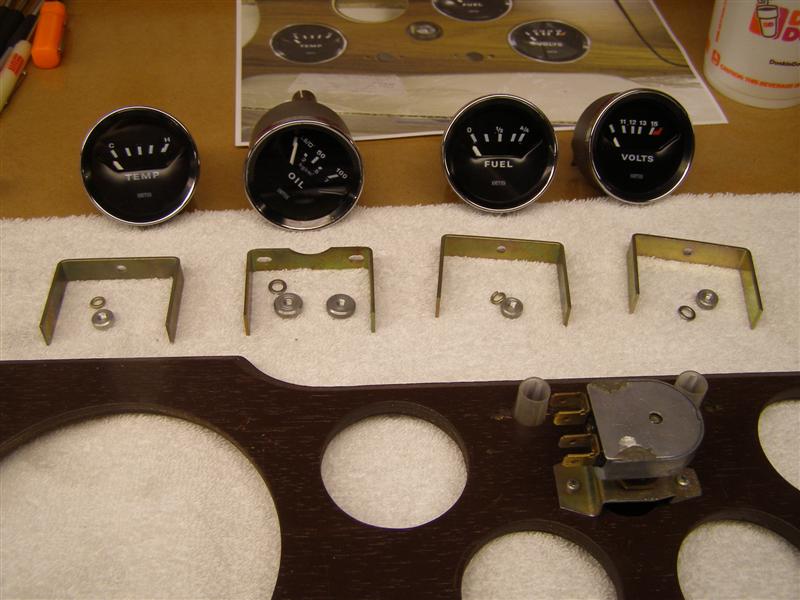
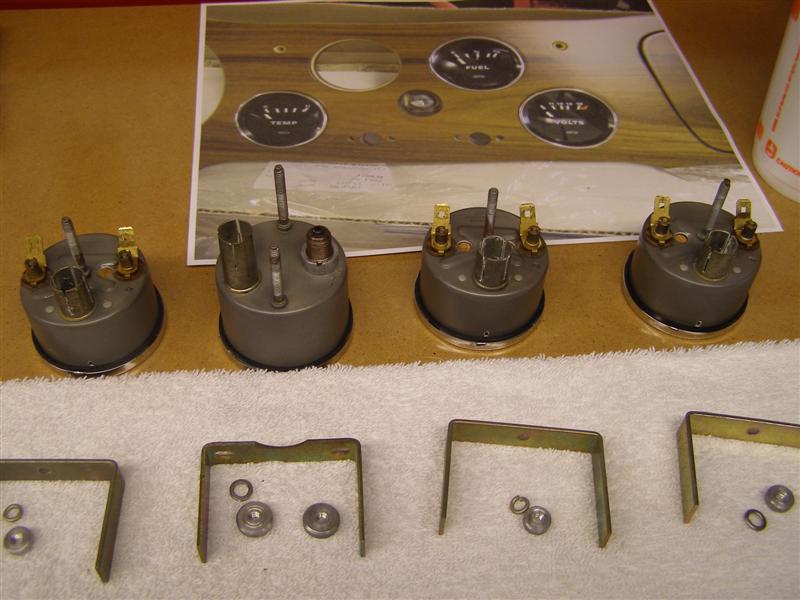
Each gauge and it's attaching brackets. Looks simple.
Notice the difference and why?
The speedometer and
tachometer have different brackets and are installed after the wooden
dash panel
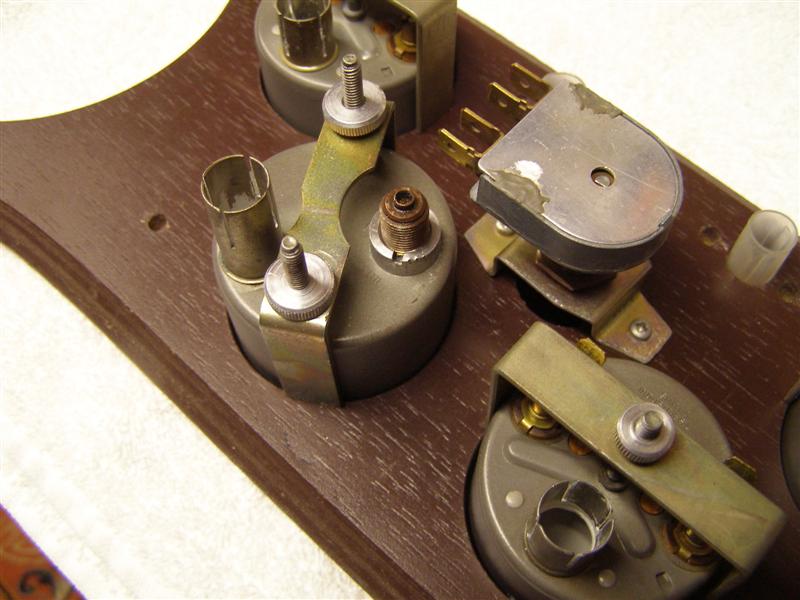
I wasn't paying
attention and installed the oil pressure gauge bracket backwards.
That and the sloppy
That's much better for the oil line to fit properly.
Everything lined up as it should be. Better now than having to pull it out again later.
A fake out with the big guys, but they look good all back in place.
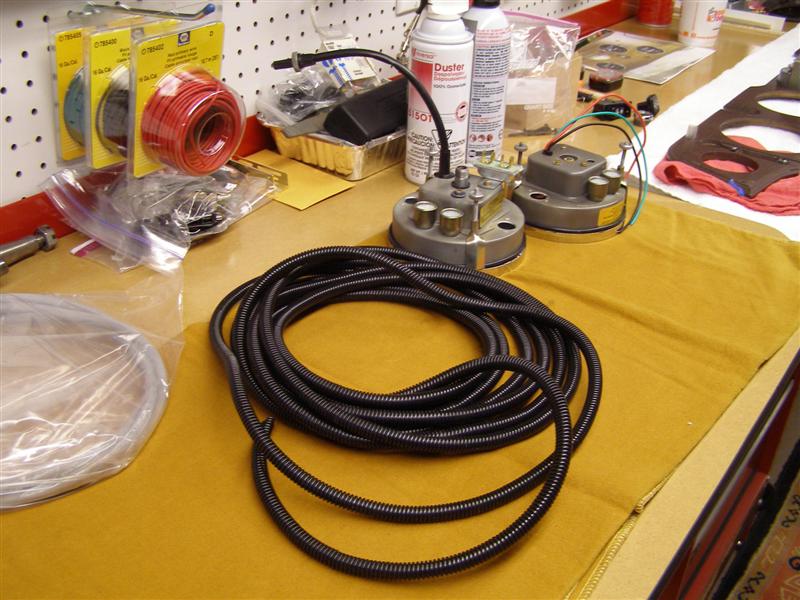
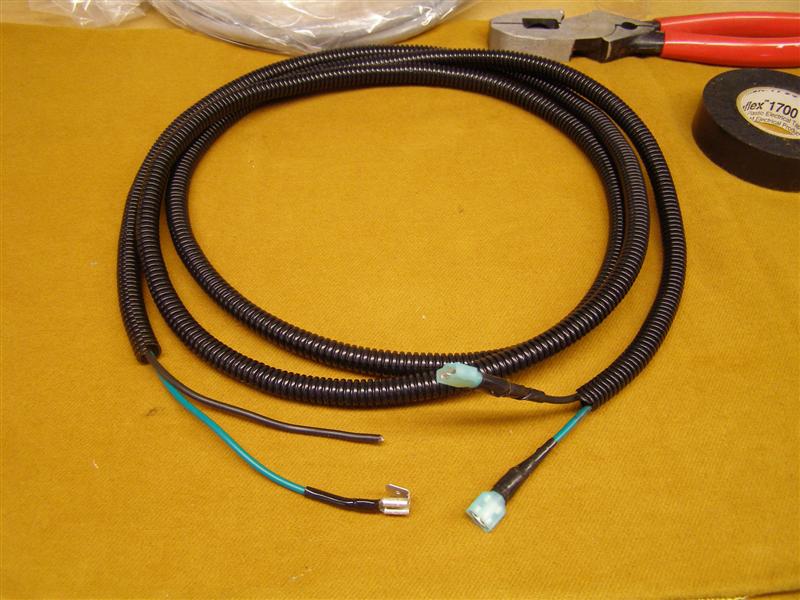
Now it's time to start on a nice neat tachometer harness to replace the cable.
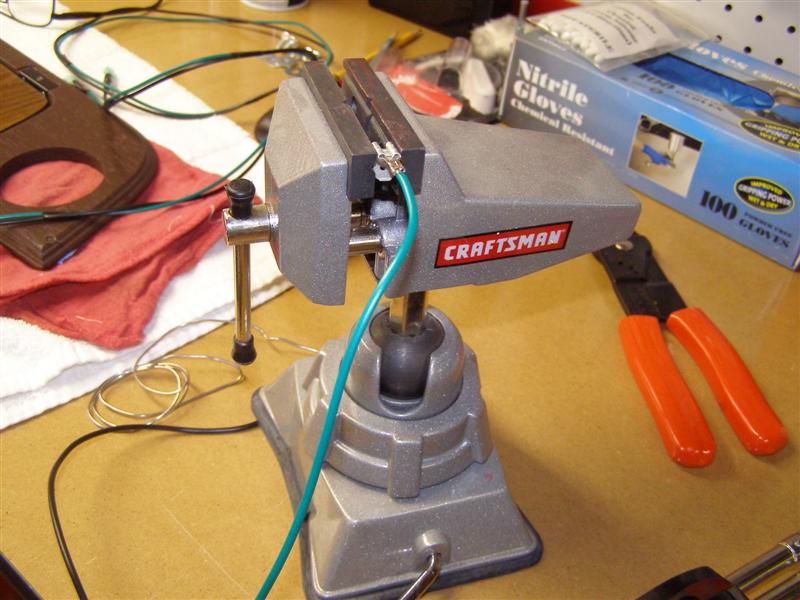
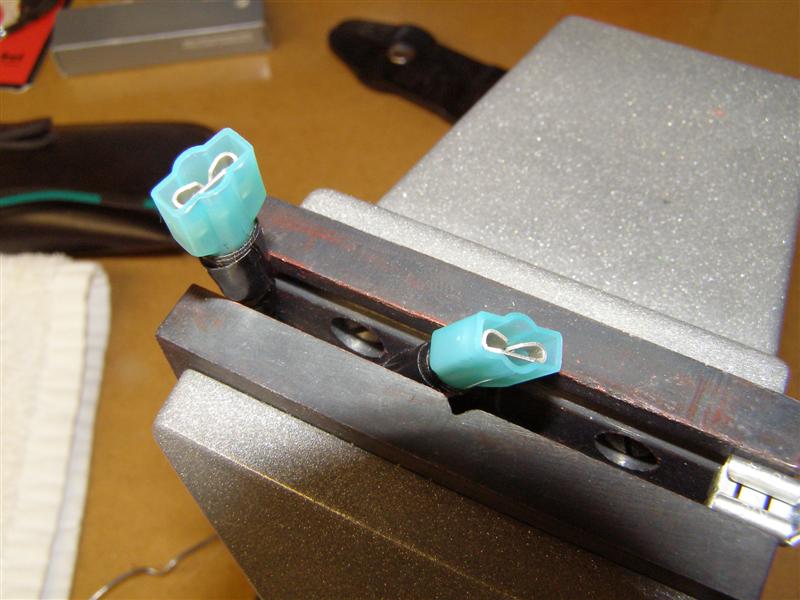
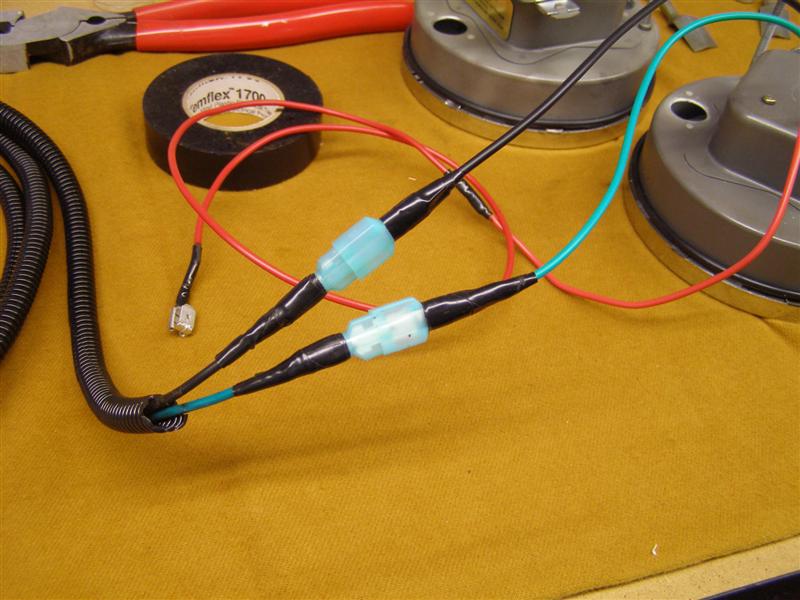
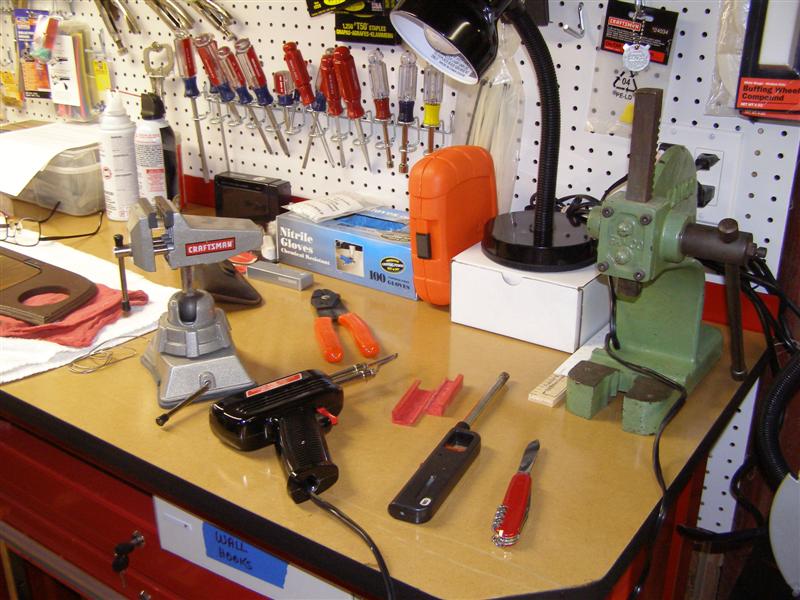
These little portable vises are great for soldering and heat shrink applications.
I wasn't sure if there was room on the stabilizer, so I added a double clip that will allow another plug in.
These will make installing and removing the tachometer a lot easier and will protect against sparks if metal is touched.
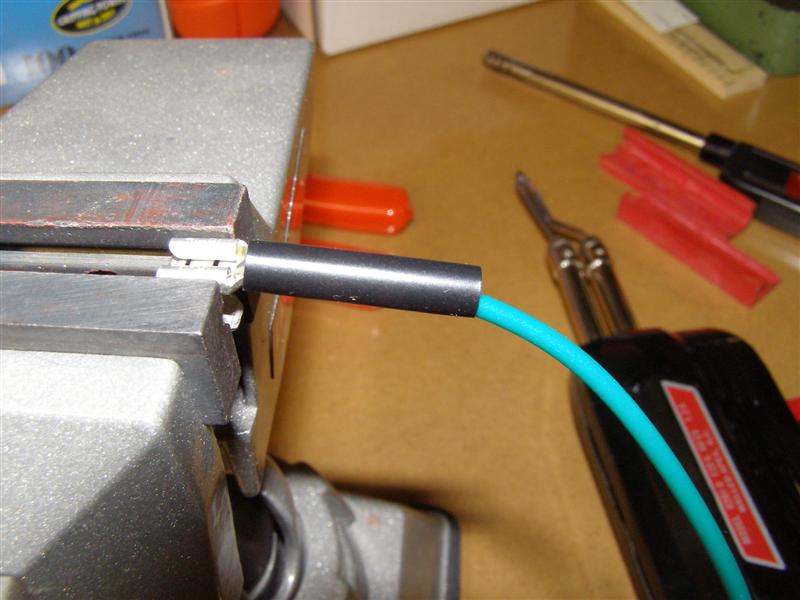
Make sure that you have the heat
shrink on the wiring BEFORE you solder the ends on. Then
Heat around the shrink uniformly to make its seal evenly and tightly all around.
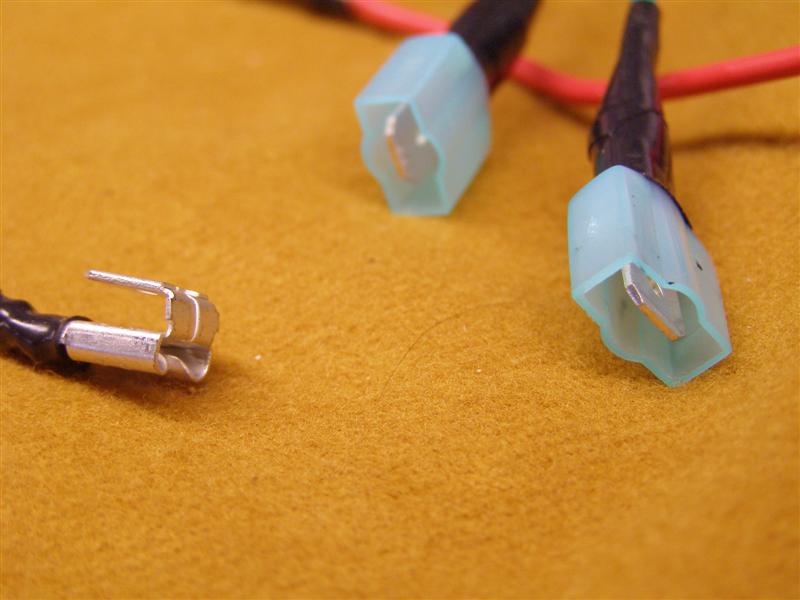
These guys are all ready to go on the tachometer.
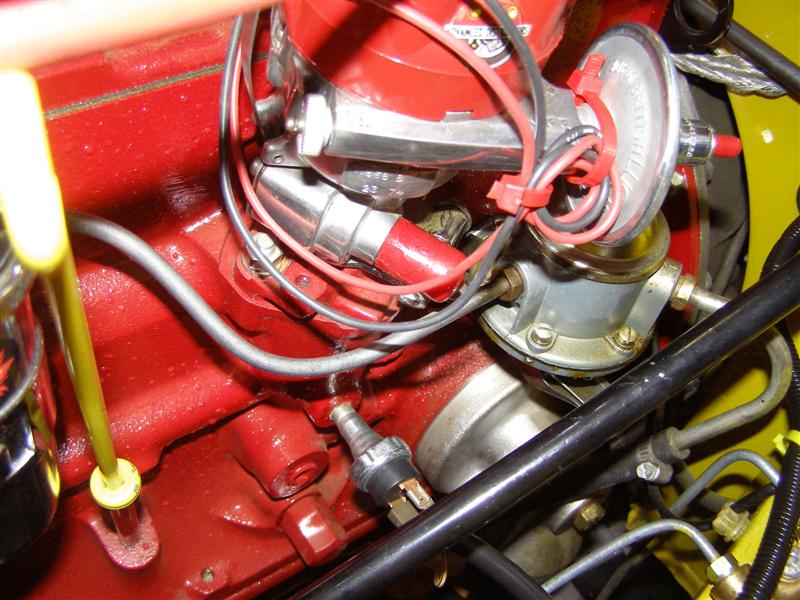
I lengthened the RED lead to allow an easier plug in to the back of the speedometer because that tachometer goes in last.
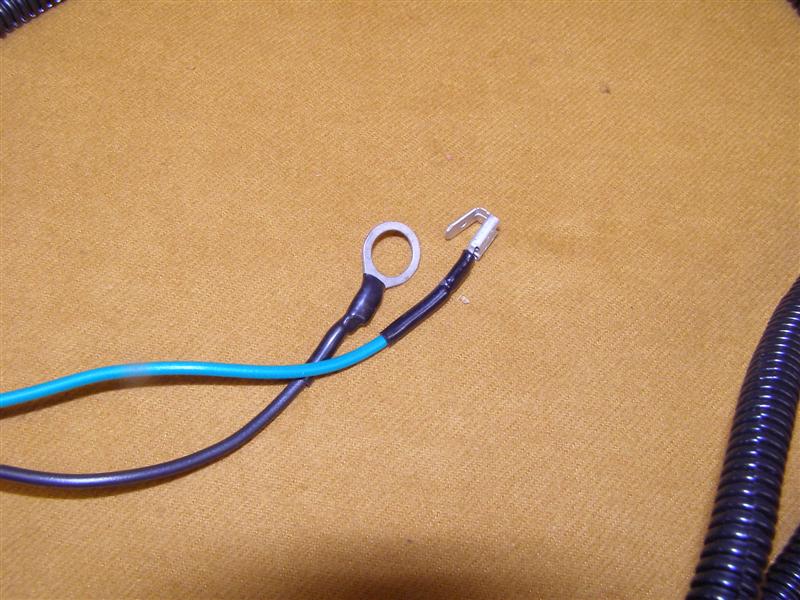
All ready except for my ground ring terminal, but that's coming up soon.
Test fits now, rather than trying to get them together for the first time inside the dash.
Just about done. This will be
long enough to follow the main body wiring and come out right under
The ring terminal will go on the
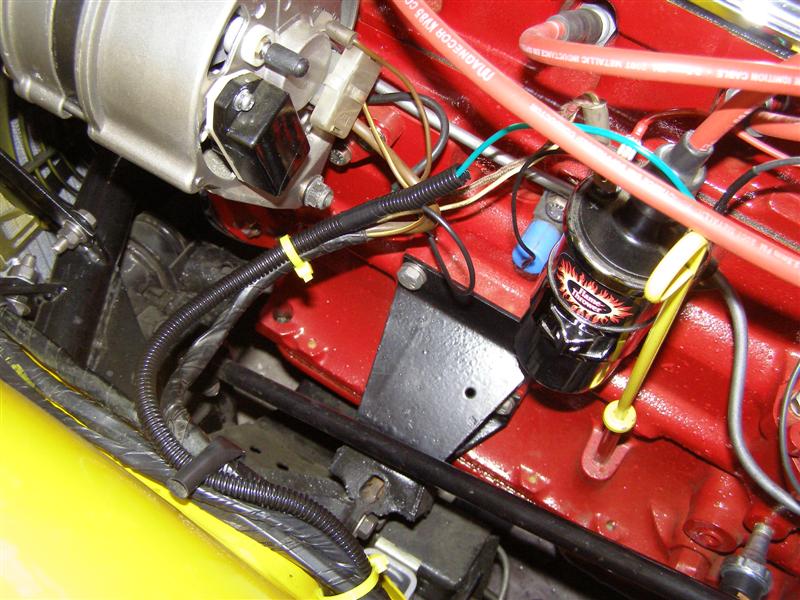
lower alternator to engine block bolt for a good ground and the
Actually, after all of this was done,
the tachometer had to come back out, so while it was out, Morris
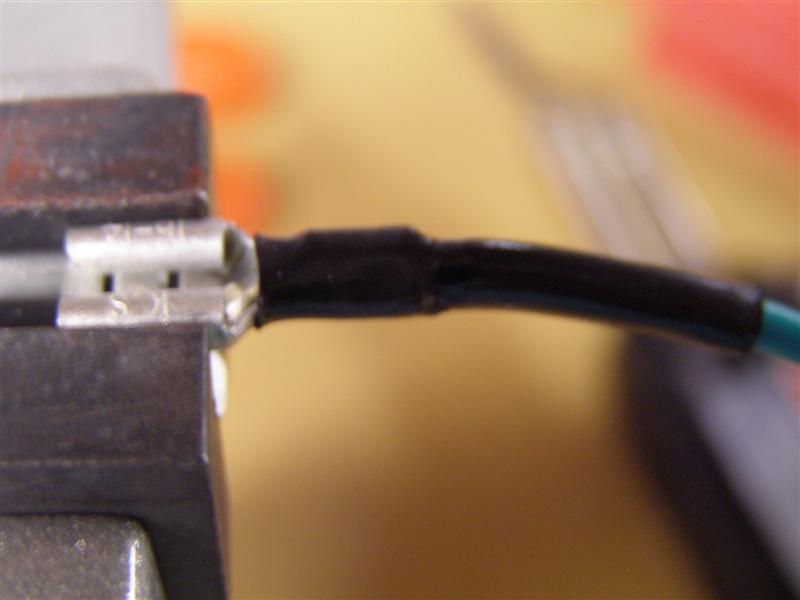
This is a little better use of the
heat shrink and it allows a neater installation in the dash. This
Good light helps when soldering too. Time to put everything away down here.
This harness follows right along with the others.
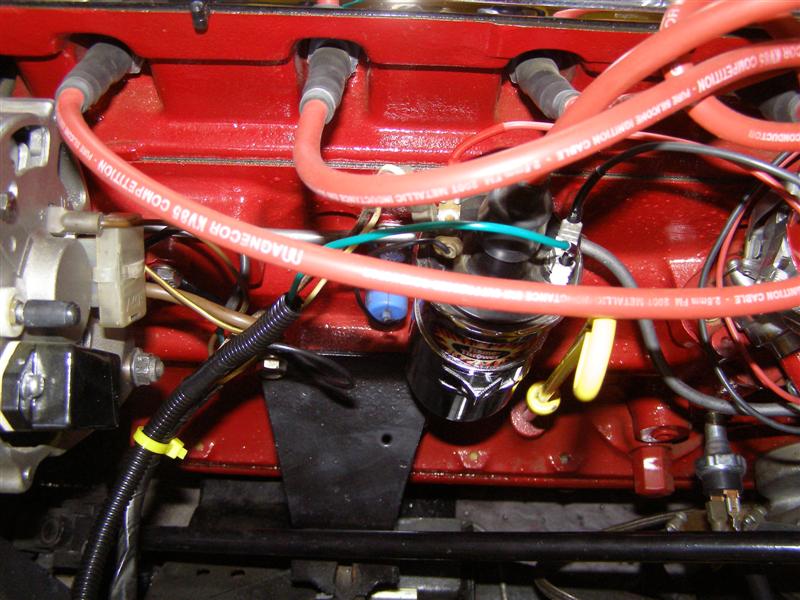
Green to negative (-) on the coil and the black, which is hidden, is grounded between the alternator bracket and the block.
Somehow, I miscalculated and ended up with an extra 12" of harness. Better too long than too short!
That looks better than the old gray cable and was much easier to fit through the grommet.
Luckily I had a
nice red silicone cap to cover the old distributor cable adapter
fitting. That is extra
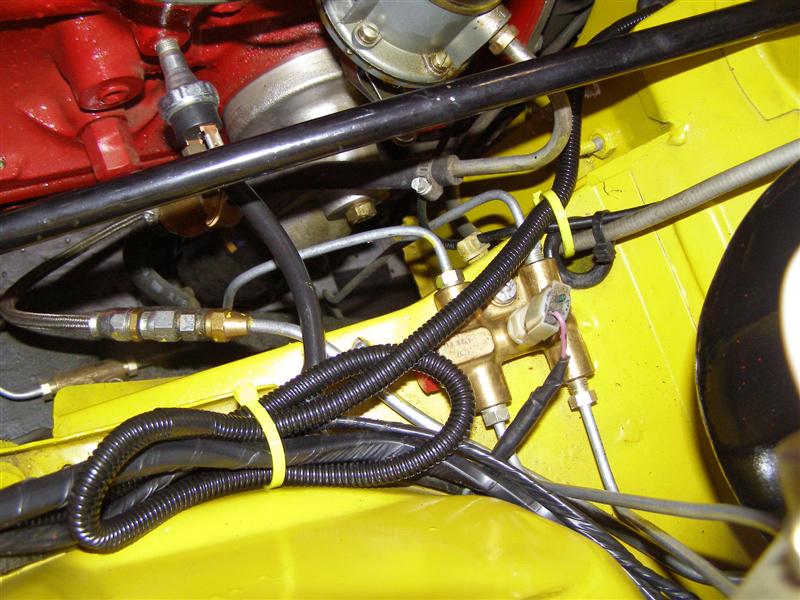
Time for a good fingerprint clean up in there and just about ready for spring.
Next project.....GoodParts
CVJ Axle Assemblies in the spring |
74TR6.com © 2017
This site was last updated 03/19/17